
First up, my wind generator from ‘The Last Stand at Glazer’s Creek’ that I first posted on last December has moved forward a bit. Here is shot of where it was when I last posted on it and where it is now .

I painted up the frame and the lean-to shed. The shed is silver with several shades of brown to rust it up.


For fun I parked my Ferrari in the shed. Given its perfect scale if I am not careful it might be 40k'ed up with a futuristic jet engine mounted on its back and some pop-up bolters on the bonnet.

I painted the decking to give it a dark weathered look.


I also started the top fan rotor section. I want it to be rusty over white paint.

This is just some dry brushing.


Slowly getting there but still quite a bit to go.


On a Sunday outing to the local model/toy shop with my little man we picked up some cars each. I found a cheap truck to much around with.


I wanted to see if I could rust it up a bit. But I went a bit overboard.


It is not finished yet but is a bit of fun. It might end up with the wind generator if it turns out ok.

The hot knife has been busy too. Here are some more of my foam adventures. [If you missed it here is how my first play with the foam knife went]

This time I was attempting to add more flat areas to my rock formations so models can be place on them. This piece was 10mm foam cut into small sections and stacked up. I glued it with PVA and had no trouble cutting through the joins with the hot knife.


The base from two stacked sheets.


Then I carved the base up a bit more.

Three pieces for ease of carving.

And here it is with texturing carved into it.


Should not be too hard to climb in-game. The first platform is only 3" high...


Lots of positions to take cover in.


First coat of paint. It will need a second to even out the colour on the top and base sections. I'll also add rocks to the base like I have with other rock pillars.


Then I went crazy and added a few more. I'll have eight rock formations in total (not counting the cliff that I started in my last post).

Plenty to fill a board for a close and personal 'Gorkamorka' feel game.


I am slowly getting though it all. It is really good fun to carve.

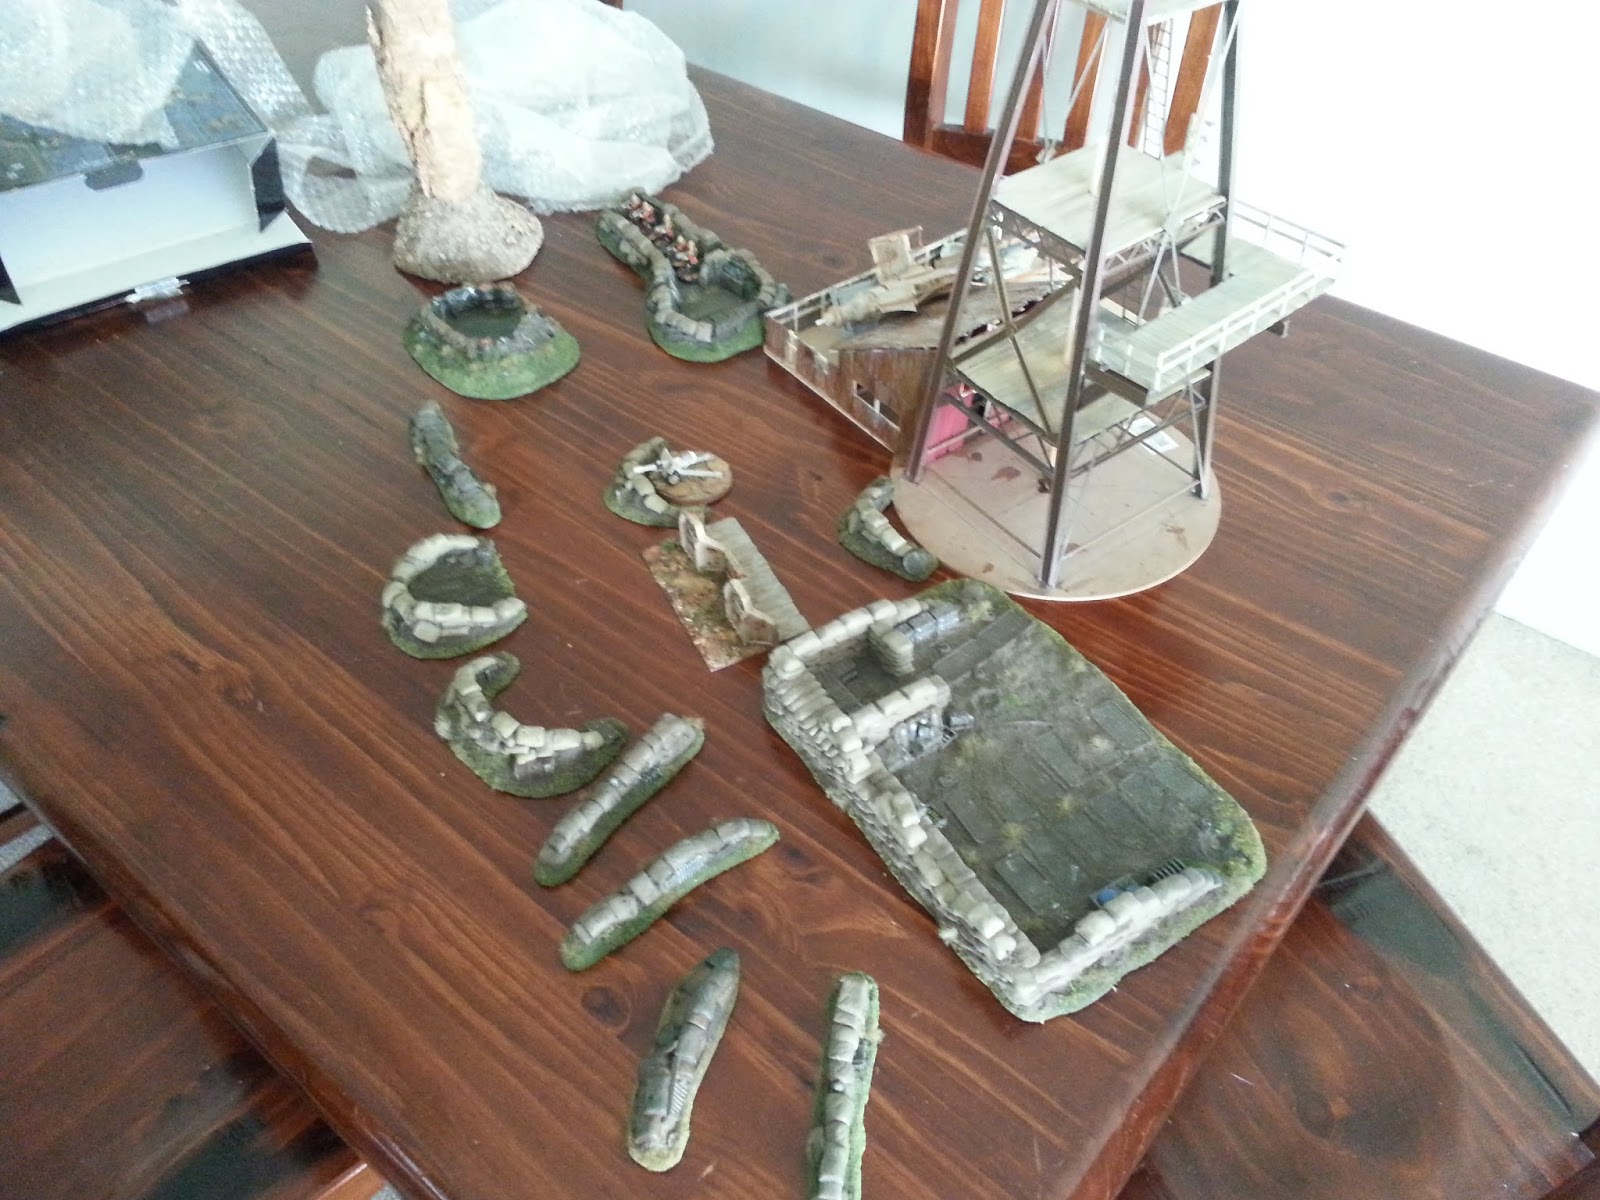
Not that I am short on terrain, but I am a real sucker for old FW terrain pieces. When I saw a guy in my Buy-Swap-Sell group parting with these FW sandbag defences I threw him an offer. I initially never heard back and thought they had gone but after a few weeks he contacted me and said that the sale had fallen through and I could have them if I was still interested, How could I say no?


It shouldn't be too much work to repaint the bases to match my terrain.

Comments are always treasured so feel free to say g'day.
Tally ho gents.
Those rock formations look really cool! You've painted them up brilliantly too. Well done :)
ReplyDeleteMight have to attempt to make some myself?
Cheers.
Thanks. Get yourself a good foam cutter and go for it. They are surprisingly easy to make. Cheers for stopping by!
DeleteNice lorry.
ReplyDeleteCheers Zzzzzz!
DeleteLove this post. That building is the spit of glazers, well done! Also the old school rocks with nice flat layers for models to stand on, brilliant! Looking forward to seeing more of this. The old forgeworld pieces are fantastic too.
ReplyDeleteThanks heaps mate. I wanted to capture the ‘feel’ of the glazers windmill but not replicated it exactly. I think it works. I have wanted to carve rocks for so long it is great to finally be getting there!
DeleteYes, you've been very busy indeed. Your foam adventures are very fun to follow and the results are stunning mate.
ReplyDeleteThe wind generator is coming along fine. I love the eagle head generator on top!
Thanks Dai, it feels like long slow progress at times but it is awesome when I step back see that it is starting to come together.
DeleteCheers, yeah space is always an issue. I am so glad and lucky to have a nice big shed to store everything away.
ReplyDeleteYeah, it will be like the old 90’s white dwarf tables. :D
ReplyDeleteAwesome work, I was just thinking I needed to re-read Glazer's Creek yesterday...
ReplyDeleteDid you ever finish this project? I am going to try to recreate the battle using Warlord Games' Rorke's Drift set.
ReplyDeletejust came across this page. Love the rock formations. Looking for a way to display my polar bear collection and was looking for ways wo make iceburgs/glaciers. Looks awesome.
ReplyDeleteCan this be water proofed?
ReplyDeleteExcelente amigo todo en especial las formaciones rocosas me dan una idea para Aser algunas
ReplyDeleteErzurum
ReplyDeleteistanbul
Ağrı
Malatya
Trabzon
S4WE
sakarya
ReplyDeletedüzce
çankırı
sivas
elazığ
BGS
https://titandijital.com.tr/
ReplyDeletedenizli parça eşya taşıma
sinop parça eşya taşıma
artvin parça eşya taşıma
antep parça eşya taşıma
AD8
235A8
ReplyDeleteOrdu Lojistik
Eskişehir Parça Eşya Taşıma
Kocaeli Parça Eşya Taşıma
Kayseri Evden Eve Nakliyat
Sinop Lojistik
3E9A1
ReplyDeleteAmasya Lojistik
Kocaeli Parça Eşya Taşıma
Sivas Evden Eve Nakliyat
Hakkari Parça Eşya Taşıma
Isparta Parça Eşya Taşıma
C4676
ReplyDeletesarms for sale
peptides
order halotestin
trenbolone enanthate for sale
steroids for sale
order parabolan
turinabol
masteron for sale
buy testosterone propionat
D8AA2
ReplyDeletekızlarla rastgele sohbet
bedava sohbet siteleri
görüntülü sohbet uygulamaları ücretsiz
konya rastgele sohbet
adıyaman canlı sohbet et
rize ücretsiz sohbet odaları
Hakkari Ücretsiz Sohbet Uygulaması
Balıkesir En İyi Ücretsiz Sohbet Siteleri
Denizli Rastgele Görüntülü Sohbet
9C46FC5B10
ReplyDeleteBerivan Çiçeği Hikayesi
Zula Hediye Kodu
Kamçatka Nerede
KA Hangi Romanın Kahramanı
Total Football Hediye Kodu
Township Promosyon Kodu
Cerca Trova Nedir
Hay Day Elmas Kodu
Yunan Alfabesi Harfleri
65F7B9F4E8
ReplyDeletetiktok takipçi satın al
Sıra Bulucu
Footer Link Satın Al
Footer Link Satın Al
Bitcoin En Güvenilir Nereden Alınır
Dragon City Elmas Kodu
Referans Kimliği Nedir
3D Car Parking Para Kodu
Footer Link Satın Al