

This project seems to be progressing faster then I can blog about it. For those that are just seeing this, it is best to start at the beginning. In Episode 1: The Concept I explained how this project came about and my thoughts on how I wanted it to end up. Keeping to the core concept is going to be really important to get the look and feel that I am aiming for. I think my brief summery of the project was an "Ancient Egyptian and Sumerian like city, paved in gold like
a mythical South American lost city but laid out with Atlantis-like rings of
water" or there about. I have started various structures (as you can see from the title photo) and here is where each of them are currently at.
The Temple
This is going to be an Egyptian style temple that is painted gold with bright pillars.These were the sorts of inspiration images that I had in mind:


.+Monuments+of+Egypt,+ca.+1821-24.+Oil+on+canvas..JPG)

To fit the theme, Bruce Hirst's Egyptian temple mould was exactly what I wanted. And lucky for me I had this mold sitting in my shed waiting for me to do something with!

Here are the silicon moulds that I used. Mould 94 (the top one) would make the structure and mould 99 (below) would add extra bits of detail.


I usually use Gedeo Hard Plaster but when I ran out I picked up some Reno Art Plaster from the local craft store. It was horrible stuff. Despite how I mixed it the blocks came out soft and crumbly. The lady at the craft store ordered me in some more hard plaster and after a weeks delay I was back casting away.

Here are some of my blocks drying. For those interested I use the 'wet water' method that Bruce explains in his advanced casting section. It's pretty simple and easy to tackle even for a novice caster.
With the first lot of blocks cast I wanted to find an easy way to get a nice smooth and even coat of gold on my terrain. I don't have a decent air gun so I opted for a can of model spray paint.

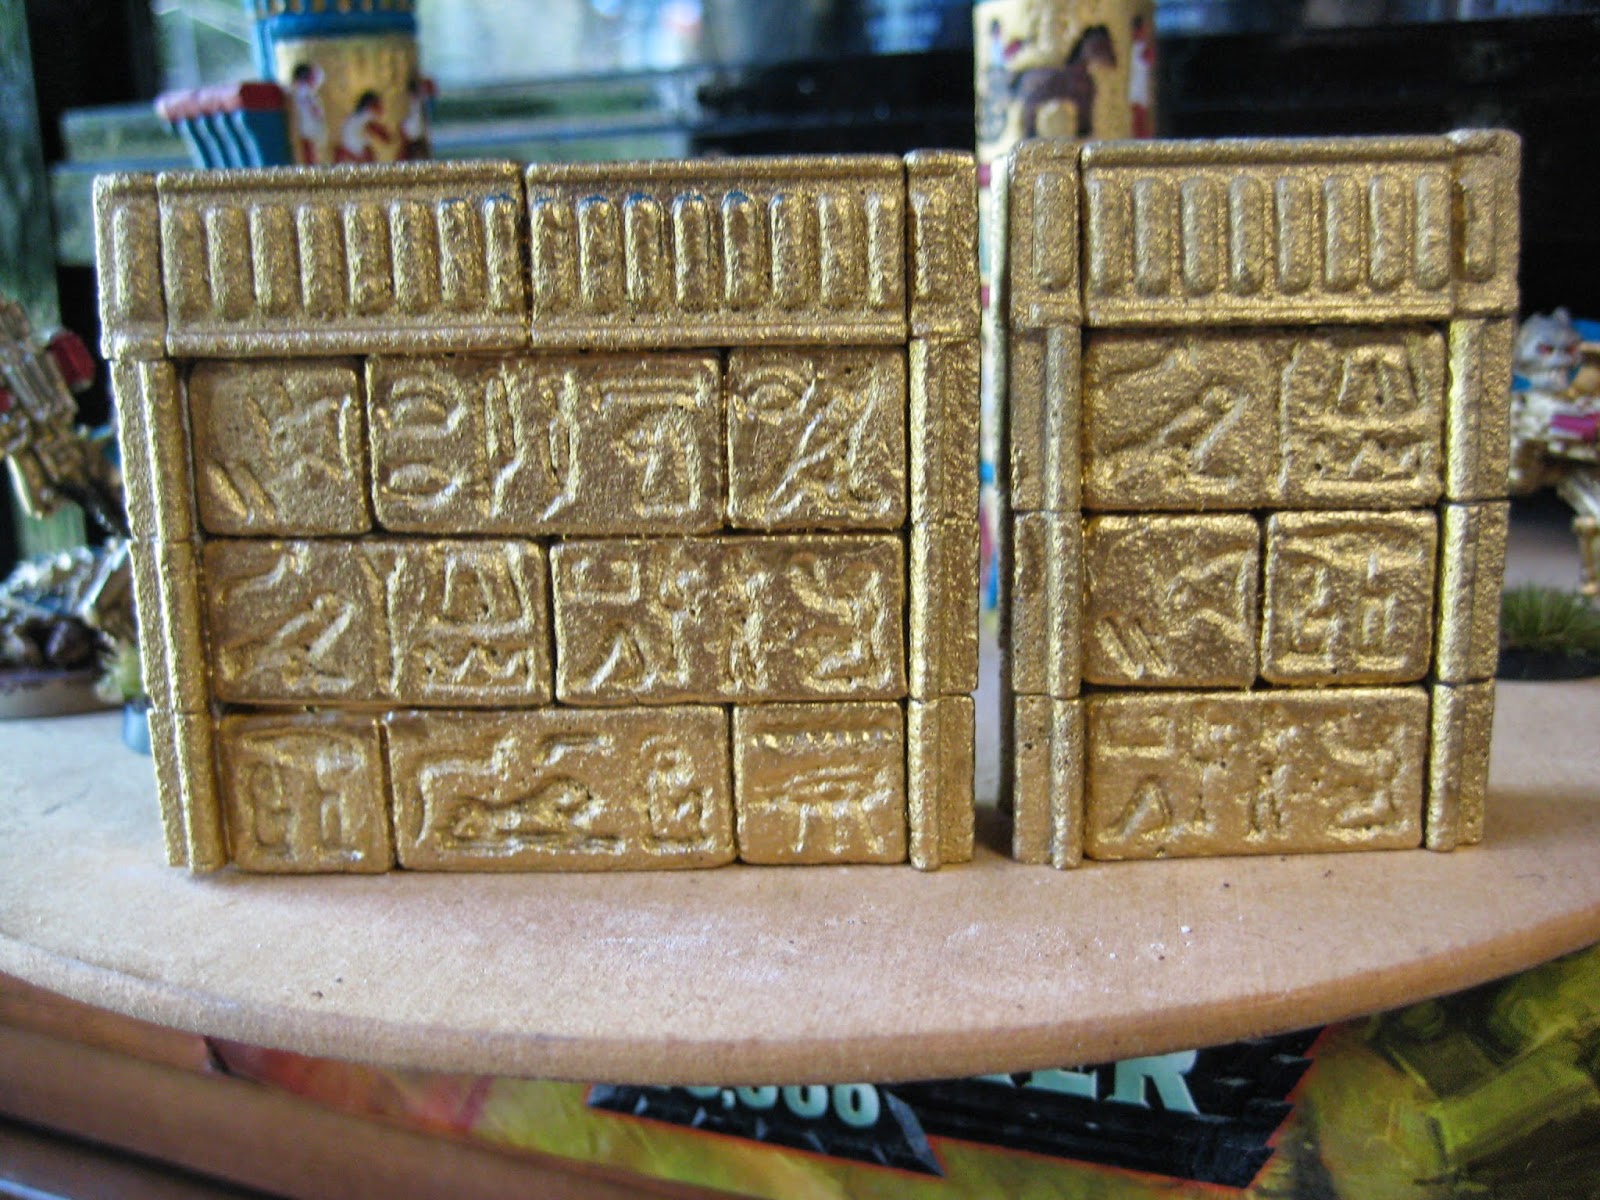
Here is the first walls sprayed gold.

And here is a practice colour scheme. I still want to give it a heavy wash to darken the recesses. Remember also that I wasn't going for an historical look, but I wanted a gold structure with bright colours to go with my gold Necrons.

I drew up a rough sketch of the layout of the temple. In the centre I wanted to add a raised altar with the original Necron symbol on it. The altar will lift out to reveal a set of stairs that lead to a tomb deep under the temple.

I cut the base out of foam card in 4 separate pieces. Two were 10mm smaller. I cut steps into one of the big pieces and one of the smaller pieces so when stacked they formed four steps up the sides.


I wanted to give the base some texture but wasn't sure what to do. Seeing that I had the left over Reno plaster I thought I'd mix some up and pour it over the base.


It was a bad move! I accidentally got bits of dried plater in the mix which was already very lumpy. At the time I thought it would be fine and add some nice texture. In hindsight I wish I hadn't.


After it dried I gave it a heavy sanding back.

At least now it was flat with a stone like texture to it.
Being that the plaster was cheap and chalky I needed to seal it before painting it. To do this I gave it a coat of PVA glue.

After it dried I spayed it with the gold paint and then ran groves into it to look like square slabs. While doing this the glue lifted in a few places, so I pealed a few squares off.


Then I gave it another coat of gold paint.


That is pretty much where I am up to on the temple. I still need to cast more blocks to build the back half and finalise the colour scheme but it is starting to take shape.
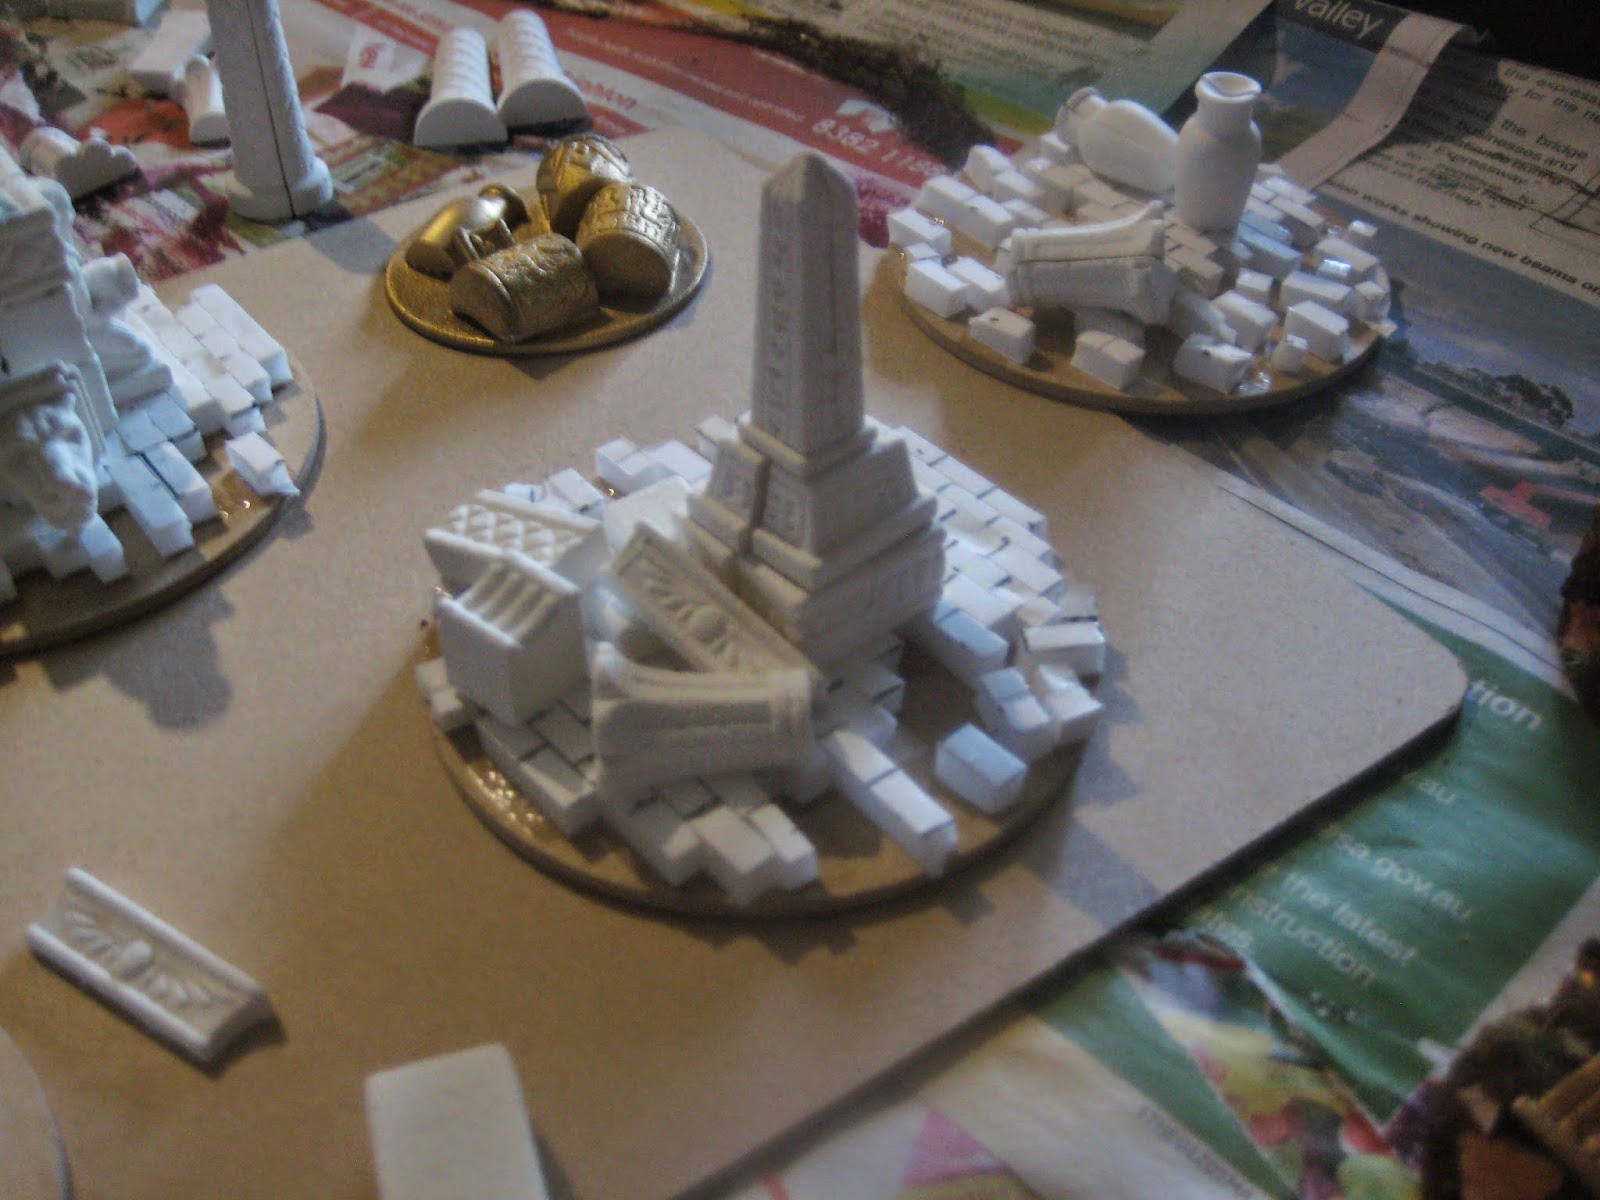
The Obelisk
To keep with the theme I wanted to add a massive obelisk too.

It took me a bit of googling and math to get the hight and angles right.

Sketched out on foam card.

All cut and glued together.
I wanted to try plaster on this as well, but I decided to be more careful this time. Here is the first coat, which I will sand and then give a second coat after.


The Ziggurat
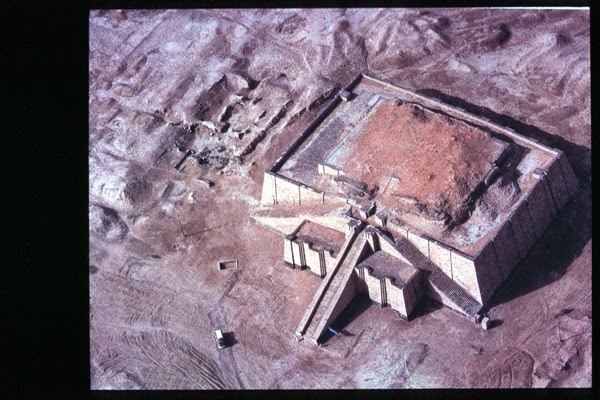
Moveing away form the Egytion structures, I really really wanted to make a mighty ziggurat to count as a FW Necron Tomb Citadel. Not sure what I mean when I say ziggurat? This is what I had in mind:
(The Neo-Sumerian Ziggurat of Ur near Nasiriyah, in present-day Iraq)


After a bit of sketching I began cutting my foam board sheets.


I joined them with PVA glue and pins.


The inner-layer done.


and the outer-layer on with the first floor sitting on the inner-layer.
Next up, stairs. Lots of stairs!


I played around with a few ideas for the small temple on the front but haven't completely worked it out yet.


Early on I toyed with the idea of putting the temple on the top of the ziggurat. I now have scratched that idea in favour of building another two levels and leaving the temple as a separate terrain piece.

After the basic first level I began texturing the 2 foot square foam base. I cut rectangle block shapes into the foam with a knife and then plastered over the top with Das clay.


Here is the upper level drying with the ziggurat sitting in place. (In this photo I was also trying to work out a way of getting the models to stand on the steps).

At this point I was thinking about how I wanted to texture the walls of the ziggurat. Plaster and clay was a little annoying so I thought about just cutting groves into the foam board. I tried it out on an off cut first and thought it looked pretty easy.


The brick work drawn on (above) and cut with a razor blade (below).


Since this photo I have finished off 'bricking' the rest of the walls and first floor.
Thinking about the Cityscape
With the first structures all taking form I began to plan ahead (as I always do) and think about the city layout. As I said in my last post, I want some arched or circular canals to run through the city. I could either cut up a spare Dead Fleet seascape or paint my own water.


I have an old table tennis table to build my city on. Here I am trying out a few city layouts that I had sketched. I'm not 100% settled on the final design yet. I still want to add a few more building and see how it looks together.


A Murder of Immortals
I didn't want to get too far on the building without having a few models to match them. So while all this was going on, a few squads of Immortals have been started.
On the idea of gold Necrons- back in 2001 when the monolith was released I remember seeing these gold Necrons in the WD and saying "If I ever paint my Necrons I'm gonna do them in gold."
Later, I actually painted mine in various shades of blue and grey, but now funny enough, I'm going back to my original plan!
Later, I actually painted mine in various shades of blue and grey, but now funny enough, I'm going back to my original plan!

Now that I knew that the Ziggurat floors would be brick I made some bases to match it. These are Das clay pressed onto normal bases then roughly sculpted by hand. After they dried I trimmed the edges and sanded the tops.


After they had dried.

All trimmed and sanded.
Here is a Necron sprayed gold.


I am batch painting the models in one go. The ones below will eventually get a heap of inks over them to shade in the recesses. Anyway here is where they are at.


My Overlord originally had a resurrection orb (above) but I wanted him to count as 'Kutlakh The World Killer' so I pulled the arm off and replaced it with a Tomb Kings sword. This meant I had to carefully tape up all the parts that I had painted to spray the arm gold again (bellow).

Here Kutlakh has his new sword.
I painted the shoulder pads with a coat of Hawk Turquoise then after it had dried painted a second coat of a mix of Liche Purple, Ultramarines Blue and Regal Blue. Then I dabbed it lightly with a tissue so the Turquoise showed though in small blotches.

Finally, I have also been working on some scatter terrain...


Summery of where I am at:


Thanks for checking out what I have been up to! :)
well done!
ReplyDeleteThanks! Cheers for stopping by.
DeleteMy lord sir, absolutely amazing work! Kudos to your dedication and ingenuity ^^
ReplyDeleteThank you your royal highness! I don’t know about dedication, probably more enthusiastic craziness.
DeleteBloody amazing work you've managed to complete, Colonel. I am excited to see more.
ReplyDeleteCheers CJ, it has been a fun side project that has grown way out of proportions. It is always fun to think big!
DeleteHave you given up work ? Or just given up sleeping for the time being ?
ReplyDeleteIt doesn't really matter, it looks brilliant.
Ha LOL, no, I’m actually working more than ever at the moment. This has progressed over a long period in sporadic jumps. Now it is time to start finishing some of the elements off!
DeleteThat is phenomenal! Absolutely brilliant work, man!
ReplyDeleteThanks Mr Mord. The freedom that scratch building brings is always exciting. The issue is sometimes (as I'm sure you know) getting stuck in to finish those bit items.
DeleteWow, this is great. I want to see more as it progresses! Good work.
ReplyDeleteCheers Dan! There will be loads more (and hopefully shorter) progress posts to come. I think the temple will be first on the ‘to finish’ list.
DeleteFriggin' epic.
ReplyDeleteYes, epic seems to be a fitting term for this herculean project! So far it has been an enjoyable journey – hopefully it stays that way.
DeleteMe too! Slow and steady and it will all come together. :)
ReplyDeleteCol. this is an impressive feat of engineering and energy. Love love love that you are so inspired by this to get so much done so quickly and to a grand standard.
ReplyDeleteI'm eager to see this city done and gleaming gold.
Thanks Dai, It has been a imaginary world to escape away from the stresses of life. With a bit of enthusiasm progress does happen pretty quick. :)
Delete